Overview
The Android Simply Connect SDK integration is an SDK for native mobile apps. It provides a full checkout experience and end-to-end payment processing for cards and APMs.
This document guides you through the process of integrating Nuvei payment solutions into your native mobile apps on the Android platform.


General Flow
- Authenticate directly from your server to Nuvei’s server (server-to-server) via API.
- Embed and invoke the SDK functionalities:
- Set basic customization
- Initialize the checkout
- Call the
checkout()method to invoke the Simply Connect checkout interface to verify the response using a webhook (DMN) or thegetPaymentStatusAPI call
UI Implementation
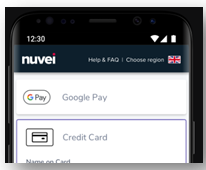
With Native Simply Connect, you can customize the top bar of Simply Connect:
- Background
- Logo
- Text and font
Example UI Customization
val customization = NuveiUiCustomization(
    // Logo (optional, relevant only for checkout screen)
    logo = R.drawable.card,
    // Toolbar/header customization (optional)
    toolbarCustomization = NuveiToolbarCustomization(
        "SECURE CHECKOUT",
        "sans-serif",
        22,
        "#FFFFFF",
        "#40C1AC"
    ),
    // Labels customization (optional, relevant only for 3DS challenge screen)
    labelCustomization = NuveiLabelCustomization(
        "sans-serif",
        14,
        "#000000",
        "sans-serif",
        14,
        "#40C1AC"
    ),
    // Text boxes customization (optional, relevant only for 3DS challenge screen)
    textBoxCustomization = NuveiTextBoxCustomization(
        "sans-serif",
        14,
        "#000000",
        "#000000",
        0,
        1
    )
)
// Next button customization (optional, relevant only for 3DS challenge screen)
NuveiButtonCustomization(
    "sans-serif",
    "#FFFFFF",
    17,
    "#40C1AC",
    5
).also {
    customization.setButtonCustomization(it, NuveiButtonCustomization.Type.NEXT);
    customization.setButtonCustomization(it, NuveiButtonCustomization.Type.CONTINUE);
    customization.setButtonCustomization(it, NuveiButtonCustomization.Type.RESEND);
    customization.setButtonCustomization(it, NuveiButtonCustomization.Type.SUBMIT);
}
// Cancel button customization (optional, relevant only for 3DS challenge screen)
NuveiButtonCustomization(
    "sans-serif",
    "#40C1AC",
    17,
    "#FFFFFF",
    5
).also {
    customization.setButtonCustomization(it, NuveiButtonCustomization.Type.CANCEL);
}
NuveiSimplyConnect.setup(customization) // also supports environment argument
Testing with Nuvei’s Integration Environment
The NuveiSimplyConnect.setup function also supports the environment argument. To configure the SDK to work with Nuvei’s integration testing environment, specify NuveiSimplyConnect.setup(customization, NuveiSimplyConnect.Environment.STAGING).
If you do not specify environment, by default, the SDK works with Nuvei’s production environment.
Checkout Initialization
For initialization, you need to set the following input fields:
merchantIdandmerchantSiteIdas received from Nuvei Integration SupportsessionToken– Retrieved from/openOrderamountandcurrency
The following optional fields and blocks, which are described in https://docs.nuvei.com/api/main/indexMain_v1_0.html?json#payment, are recommended:
clientUniqueId– To set your identifier for the transaction.clientRequestId– Optional for idempotency support.customData– Set custom data to the transaction that can be viewed on the reporting.billingAddressshippingAddressuserDetailsmerchantDetailshippingAddressuserDetailsmerchantDetailscountryCode
val input = NVPayment(
    sessionToken,
    merchantId,
    merchantSiteId,
    currency,
    amount,
    clientUniqueId, // Optional
    clientRequestId, //Optional
    customData, // Optional
    billingAddress, // Optional
    shippingAddress, // Optional
    userDetails, // Optional
    merchantDetails, // Optional
    countryCode: 2-letter ISO country code; for example, US //optional
)
Checkout Invocation
Once you have an instance of NVPayment class (e.g. “input”), call the NuveiSimplyConnect.checkout() method as follows:
NuveiSimplyConnect.checkout(
    /*Activity*/this,
    /*NVInput*/getInputObject(),
    /*Boolean*/binding.forceWebChallengeCheckBox.isChecked,
    object : Callback<NVCreatePaymentOutput> {
        override fun onComplete(response: NVCreatePaymentOutput) {
            when (response.result) {
                NVOutput.APPROVED -> {
                    // TODO: Handle approved transaction
                }
                NVOutput.CANCELLED -> {
                    // TODO: Handle cancelled transaction
                }
                NVOutput.DECLINED -> {
                    // TODO: Handle declined transaction
                }
                NVOutput.ERROR -> {
                    // TODO: Handle error
                }
            }
        }
    }) { response, activity, declineFallback ->
    // TODO: Display a dialog using the argument activity object if needed
    // TODO: On dialog dismiss (or instead of the dialog) call the declineFallback with the desired action to be performed
}
Example Output
The output fields returned include:
- result: Values can be either APPROVED, DECLINED, or ERROR (in case of any error).
- errCode and errorDescription: In the case of an error, these fields contain the decline reason and error description. Please view Result handling for details.
class NVCreatePaymentOutput(
        result: String,
        userPaymentOptionId: String? = null,
        ccCardNumber: String? = null,
        bin: String? = null,
        last4Digits: String? = null,
        ccExpMonth: String? = null,
        ccExpYear: String? = null,
        transactionId: String? = null,
        threeDReasonId: String? = null,
        threeDReason: String? = null,
        challengePreferenceReason: String? = null,
        isLiabilityOnIssuer: Boolean? = null,
        cancelled: Boolean = false,
        challengeCancelReasonId: String? = null,
        challengeCancelReason: String? = null,
        errorCode: Int? = null,
        errorDescription: String? = null,
        rawResult: Map<String, Any>? = null,
        val isDirect: Boolean? = null,
        val redirectUrl: String? = null
)
 Last modified February 2025