Overview
Prerequisites
- Make sure the device running your website or application is compatible with Apple Pay.
- Your domain must have a valid SSL certificate.
- Verify that all web pages hosting the Apple Pay button are HTTPS and your web server supports TLS 1.2.
- Set up your server for secure communications with Apple Pay.
Follow the steps in the Setting Up Your Server page, including the Allow Apple IP Addresses for Domain Verification section.
Registration
In order to integrate Apple Pay into your website or application, you must register in the Apple system.
There are two ways to do this:
- Simplified Apple Pay Setup (Recommended)
- Manual Registration
Simplified Apple Pay Setup
Requirements
To complete registration and verification your merchant domain, Apple needs access to the IP addresses listed at the following link: Allow Apple IP Addresses for Domain Verification.
If your domain is protected from public access, you should allow access to the IP address ranges listed above because Domains cannot be behind a proxy or redirect.
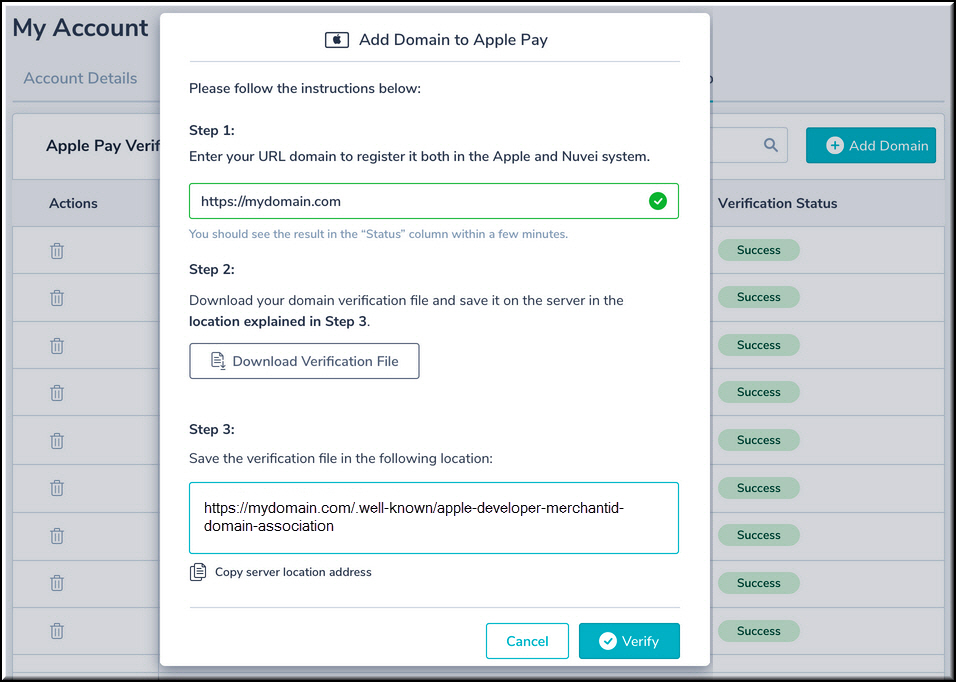
Steps
Open the Control Panel and follow the steps described in: Adding an Apple Pay Domain.
Manual Registration
The Simplified Apple Pay Setup is the recommended way to register, however, there are some merchants who choose to manually register their own Apple ID (or use an existing Apple ID) in the Apple System, enroll in the Apple Developer Program, and register a Merchant ID in the Apple System. For details, see (Manually) Register in the Apple System.
 Last modified September 2024