Overview
Assumptions and Restrictions
Before installing the Nuvei plugin, you need to have WordPress installed. The WooCommerce module should also be installed and configured.
If you do not have test credentials to test the payment flow, please contact the Nuvei Integration Team.
Requirements
The merchant profile must have enabled DMN and DCC support.
Integration with Other Plugins
The current plugin is integrated with:
- Multi-step checkout for WooCommerce
- WooCommerce subscriptions
Installation
To install the Nuvei plugin using the native WordPress plugin functionality:
- Log in to WordPress backend with your credentials.
- Navigate to Plugins > Installed Plugins and then press the Add New button.

- Enter ‘Nuvei’ in the search field and install ‘Nuvei Payments for WooCommerce’ by Nuvei.
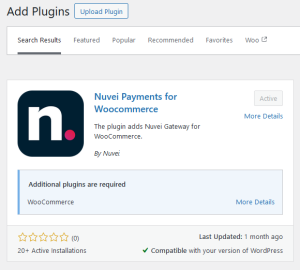
- After successful installation, you should see the status ‘Plugin Activated’.

- During the installation process, the plugin attempts to add a directory ‘nuvei-logs’ in site_root/wp-content/uploads. If possible, check if the folder is added.
Plugin Configuration
Before setting up Nuvei WooCommerce plugin, you should contact the Nuvei Integration Team to provide account credentials.
To configure the Nuvei plugin:
- Navigate to WooCommerce > Settings.

- Select the ‘Payment’ tab, search for ‘Nuvei Checkout’ and press the Manage button.

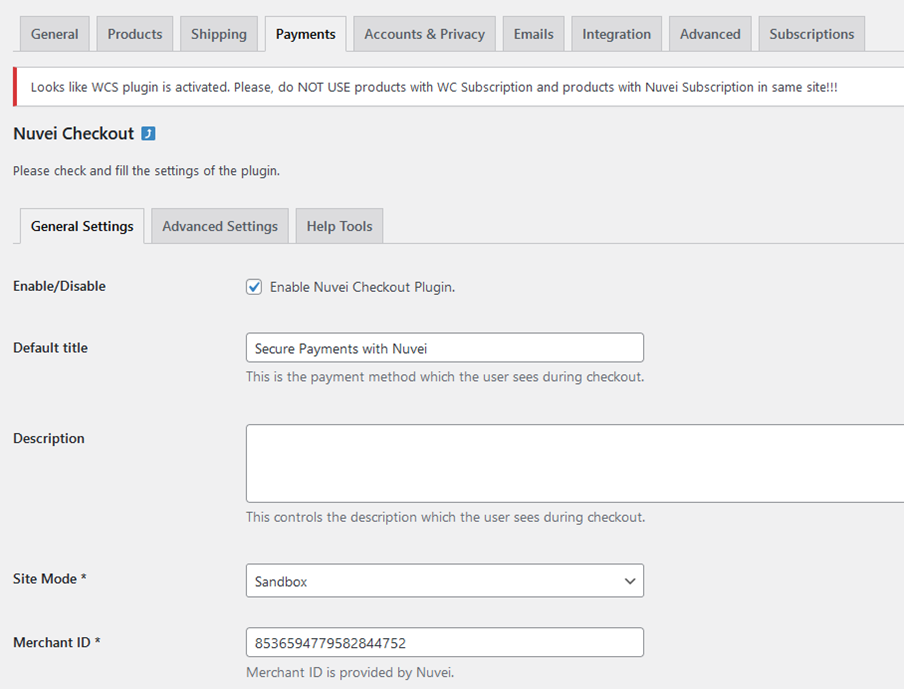
The plugin settings are separated onto the following tabs: General Settings, Advanced Settings, and Help Tools.
General Settings Tab
| Field Name | Mandatory | Notes |
|---|---|---|
| Enable/Disable | no | Enables or disables the Nuvei plugin |
| Default Title | yes | The name of the payment option in your Payment Page |
| Site Mode | yes | Choose between Sandbox and Live mode. |
| Merchant ID | yes | This is the merchant ID provided by Integration Team. If you don’t have it, please contact Integration. |
| Merchant Site ID | yes | This is the Merchant Site ID provided by Integration. If you don’t have it, please contact Integration. |
| Secret Key | yes | This is the secret key provided by Integration. If you don’t have it, please contact Integration. |
| Hash Type | yes | The hash type provided by Integration. If you don’t have it, please contact Integration. |
| Payment Action | yes | Use Authorize or Authorize & Capture (Sale) mode. |
| Allow Auto Void | no | Allow or not; plugin to initiate Void request when the DMN cannot find corresponding Order in the Store. |
| Save Daily Logs | no | Creates daily logs with sent and received data and settings. The logs are very helpful for debugging and resolving problems with the plugin. These logs are recommended since each file has a secure unique name. |
| Save Single Log File | no | Creates single log file to write in it. It is a less secure file, but may be useful in some cases. |
| Hide WCS Warning | no | When WCS products and Nuvei Rebilling products are present in the same store, a warning message is displayed (see the top of the image above). |
Advanced Settings Tab
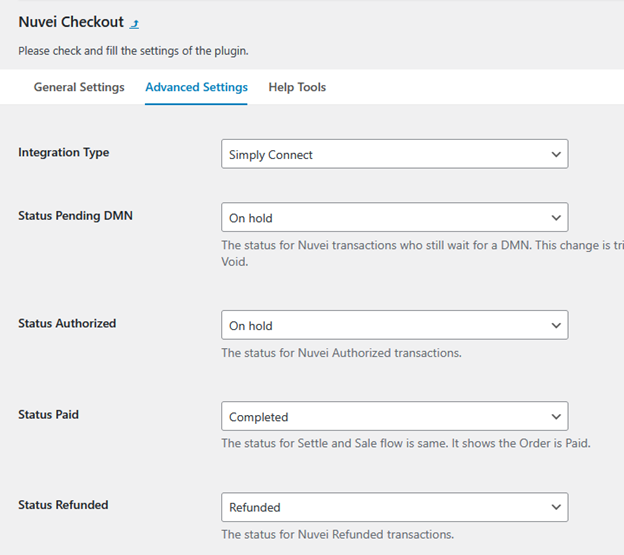
| Field name | Mandatory | Notes |
|---|---|---|
| Integration Type | Yes | Choose between Cashier (redirect page) and Simply Connect checkout. Most of the options here are available only for Simply Connect. |
| Common Settings | ||
| Status Pending DMN | No | Set WooCommerce status for Nuvei Pending Orders. |
| Status Authorized | No | Set WooCommerce status for Nuvei Authorized Orders. |
| Status Paid | No | Set WooCommerce status for Nuvei Paid Orders. |
| Status Refunded | No | Set WooCommerce status for Nuvei Refunded Orders. |
| Status Voided | No | Set WooCommerce status for Nuvei Voided Orders. |
| Status Failed | No | Set WooCommerce status for Nuvei Failed Orders. |
| Mask User Data into the Log | No | Try to mask the sensitive data into the logs. |
| Cashier Settings | ||
| Combine Cashier Products into One | No | Combine the products into one to avoid eventual problems with taxes, discounts, coupons, or restrictions into the URL length. This options is available only for the Cashier integration. |
| Simply Connect Settings | ||
| Enable Nuvei GW for Zero-total Products | No | If this option is enabled, only Nuvei GW is listed as a payment option. This option can be used for Card authentication. Zero-total checkout for rebilling products is enabled by default. |
| Allow Client to Use UPOs | No | Enable or disable usage of UPOs. |
| Save UPOs for Guest Users | No | Save UPOs for guest users or not. The recommended option is No. |
| Allow Rebilling with PayPal | No | Give PayPal as an option in Nuvei GW, but disable the usage of UPOs. |
| Simply Connect Theme | No | Switch between available themes. |
| Use Currency Conversion | No | Enable or disable or force the usage of DCC. |
| Block Cards | No | Block cards if needed. |
| Block Payment Methods | No | Block some of the available payment methods. Do not use this option and the Block Cards option at the same time! |
| Choose the Text on the Pay Button | No | Select from amount or selected payment method. |
| Auto-expand PMs | No | May not work for all themes. For better user experience, we recommend setting it to Yes. |
| Checkout Log Level | No | The logging level of Simply Connect. |
| Simply Connect Styling | No | Add your own style in JSON format. |
| Translations | No | Translate Simply Connect elements. |
| Google Merchant ID | No | If you plan to use Google Pay and want to use your own Merchant ID. |
| Google Button Color | No | Choose the button color. |
| Google Button Type | No | Choose the text on the button. |
Help Tools Tab
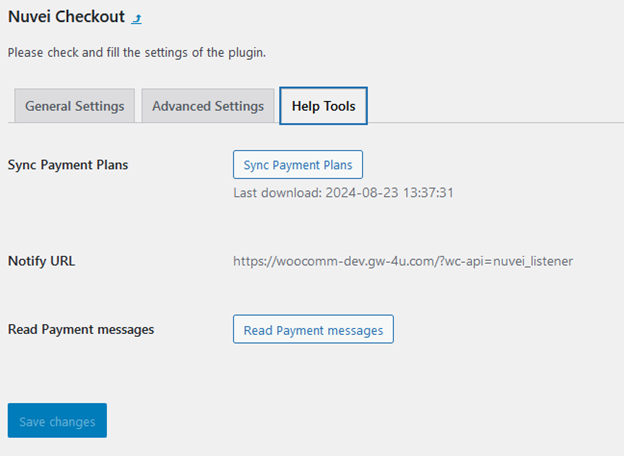
When you click the Sync Payment Plans button, the plugin downloads your latest payment plan from your merchant profile.
Test the URL as you open it in the browser. If you receive a DMN Error response, the URL is correct. The URL is accessible; expect some mandatory parameters. Provide the email to the Integration team, so the email can be added in the merchant configuration and later be used in the Nuvei Rebilling system. If you see a notification about a missing Order for a transaction, click the button to load the messages. If you click the close button, the notification is marked as read.

To check read messages, click on ‘Help Tools’ > ‘Read Payment messages’.

Press Save changes on any tab to save the settings.
Payment Page
- Select a product from your shop and go to the Payment Page.
- Enter your billing details and select the Nuvei payment option.
If the merchant uses Simply Connect checkout, the form loads if it is available.
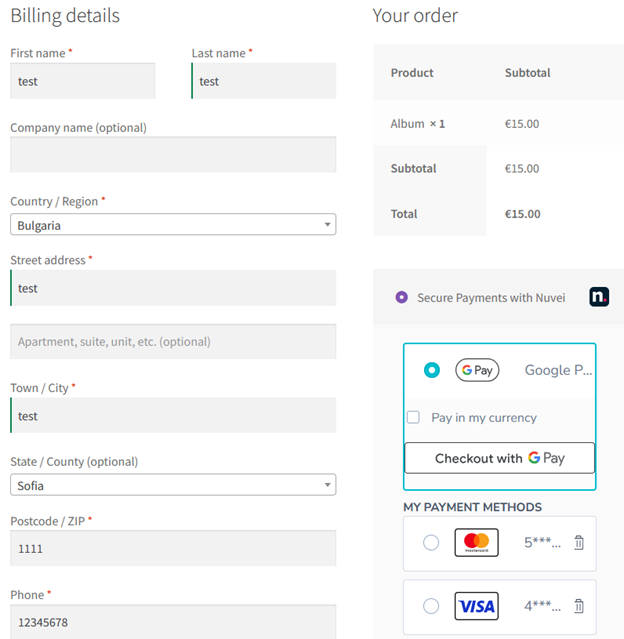
- If the merchant uses the Cashier as a checkout option, the client is redirected to the hosted payment page. The actual page may be different depending on the merchant theme.

If you press “Go Back“, you are redirected to your shop’s checkout page.
-
Upon successful payment, you are redirected to your shop successful order page.

Order Payment Status Update
Order payment details can be found in ‘WooCommerce’ > ‘Orders’ menu. Press on any order to see the details.
For each order processed with Nuvei, there are order trace notes to help track the payment process.
- Once the order is saved and the user is redirected to the secured checkout page, the order status changes to “pending payment”.

- After successful payment, the transaction is processed and the order status is updated in the background.

Order Details
The Order Details page and the logs (if they are enabled) are the two places where the merchant can see what happened with an order.
- If the merchant flow is “Auth & Settle” (Transaction Type option), all new orders have status “Pending payment” and under the Items you see two buttons: Refund and Settle.

Use the Settle button to settle the Order and use the Refund button to request a refund. For each button, you must confirm your action. After the action completes, notes with information are created. - If the merchant flow is “Sell” or the order was Settled, the following two buttons are available: Refund and Void. You can either request a refund or void your transaction.

For the supported refund amount, contact the Nuvei Integration Team. After the process is finished, the notes are saved.
If the refunded amount is equal to the total order amount, WooCommerce changes the status to “Refunded”. If you void your order, the status is changed to “Canceled”.
If your refund is rejected for some reason, you must manually delete the created Refund record.
 Last modified December 2025