Nuvei – Onsite Cards Setup Guide for Shopify
This guide walks you through how to:
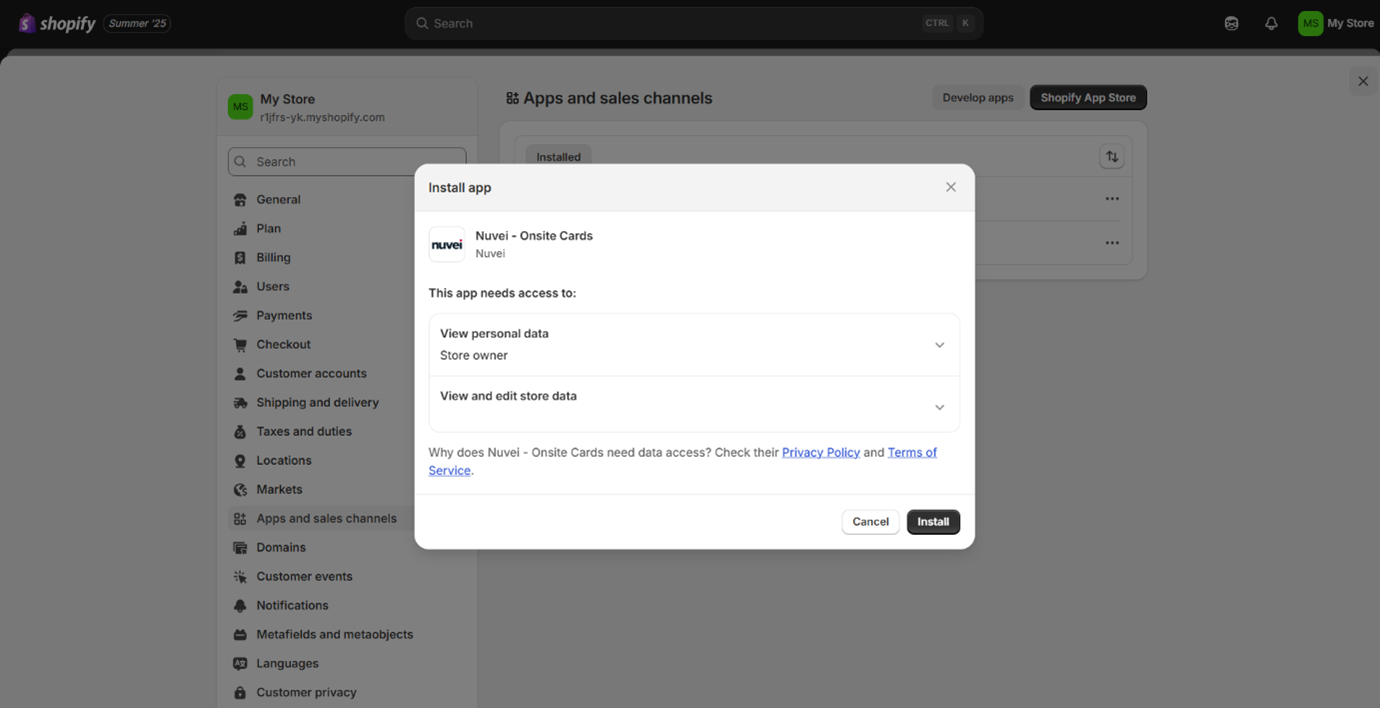
- Install the Nuvei – Onsite Cards app
- Set up and manage Nuvei credentials
- Enable test mode for safe testing
- Activate the payment method
- Understand Shopify’s payment capture options
- Install the Nuvei – Onsite Cards App
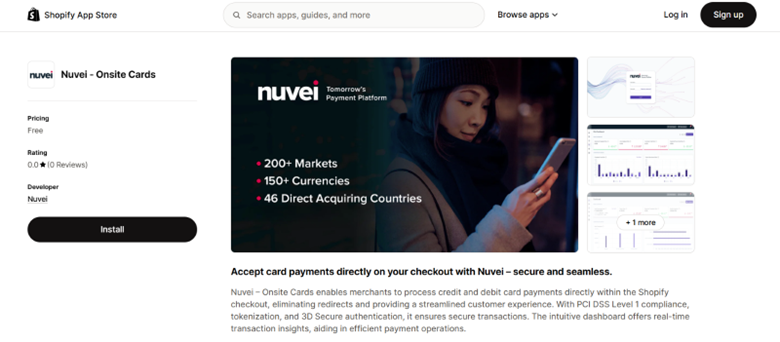
Step 1: Press the following link to open the Nuvei Payments App installation page: https://apps.shopify.com/nuvei-onsite-cards
🔑 2. Manage and Set Up Nuvei Credentials
Once installed, go to:
Settings > Payments > Nuvei – Onsite Cards > More actions > Manage
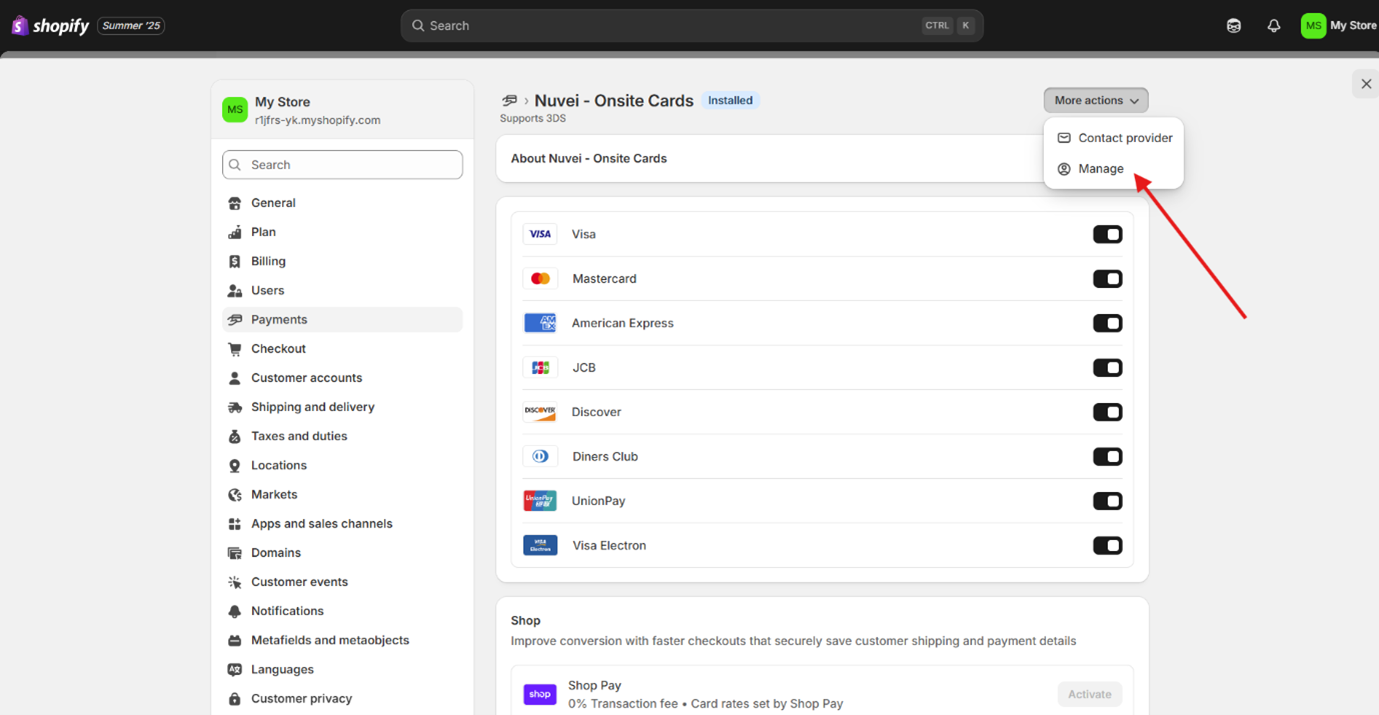
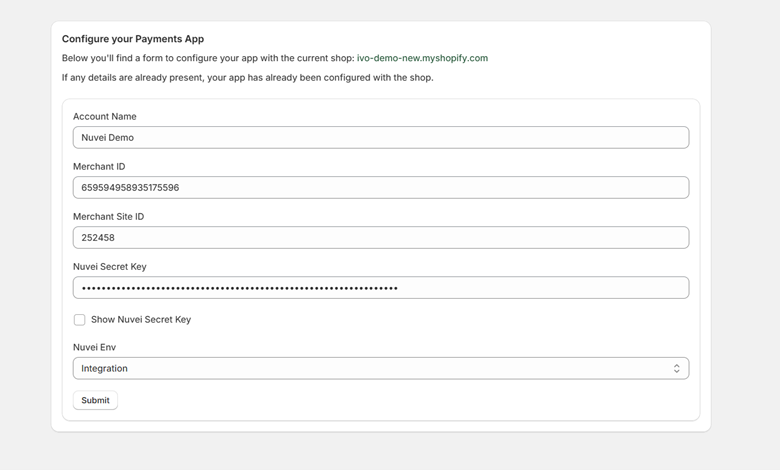
Click Manage to open the Nuvei settings page where you will enter your Nuvei credentials (provided by your Nuvei account manager). You can also find your credentials once you log in to your Nuvei C-Panel under Account Settings.
🧪 3. Enable Test Mode (Optional)
For testing transactions before going live:
- Scroll to the Test mode section
- Toggle the switch ON
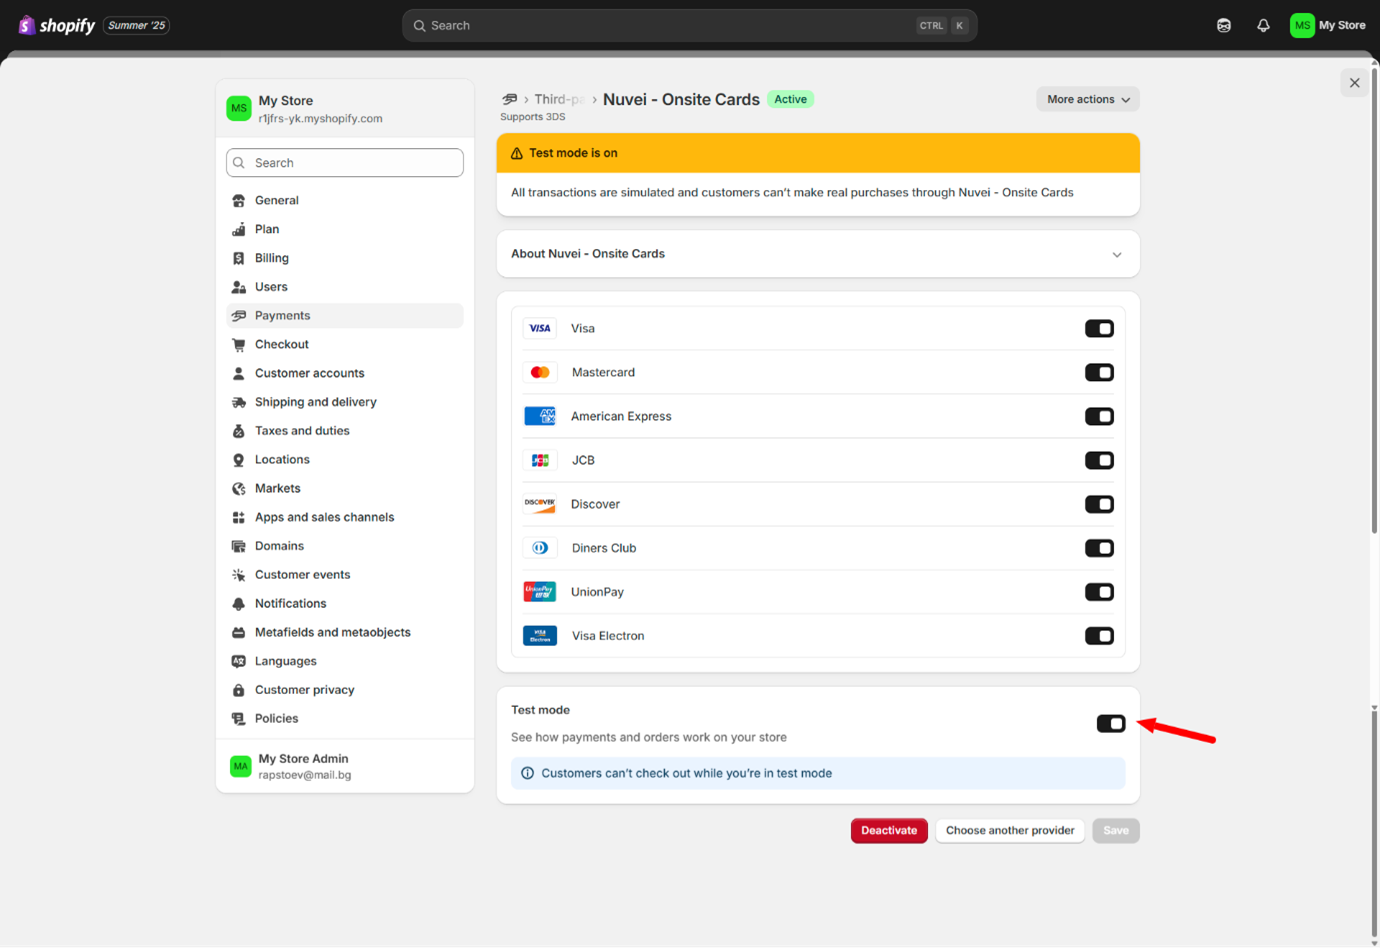
📝 Note: While in test mode, real purchases won’t be processed. Customers also won’t be able to check out until it’s turned off.
🟢 4. Activate Nuvei Payment Method
Once your credentials are set and (optionally) test mode is enabled:
- Scroll down and click Activate
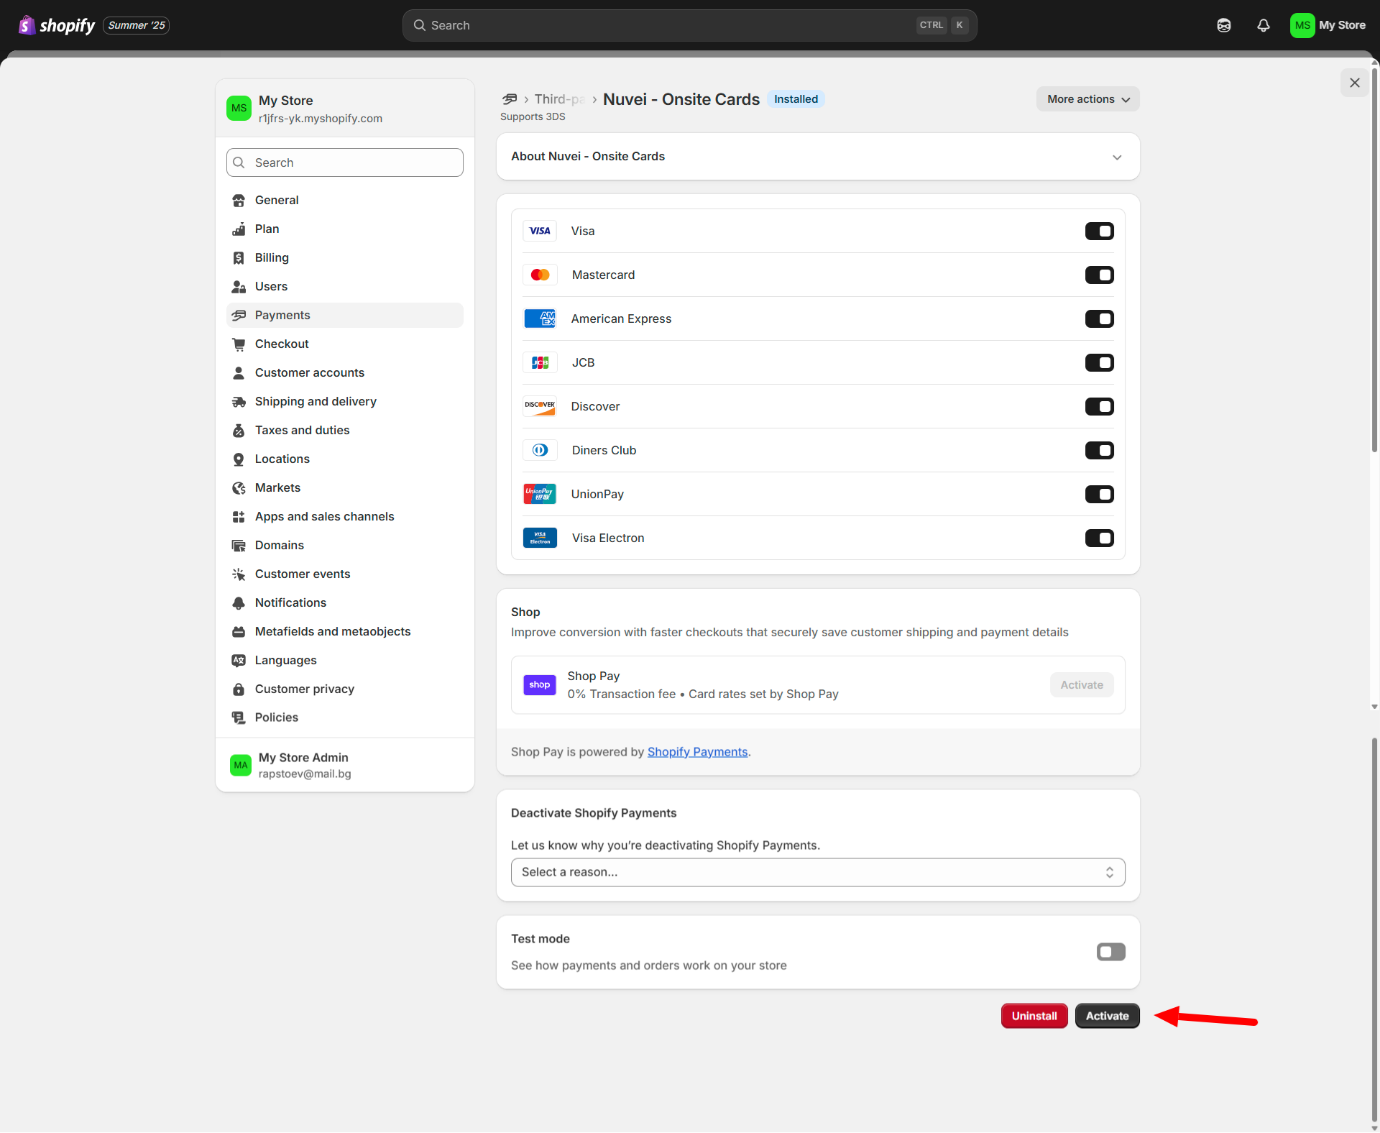
You’re now ready to start accepting payments!
💳 5. Configure Payment Capture Settings
Shopify allows you to choose how and when payments are captured after a customer places an order:
Go to Settings > Payments, then scroll to Payment capture method
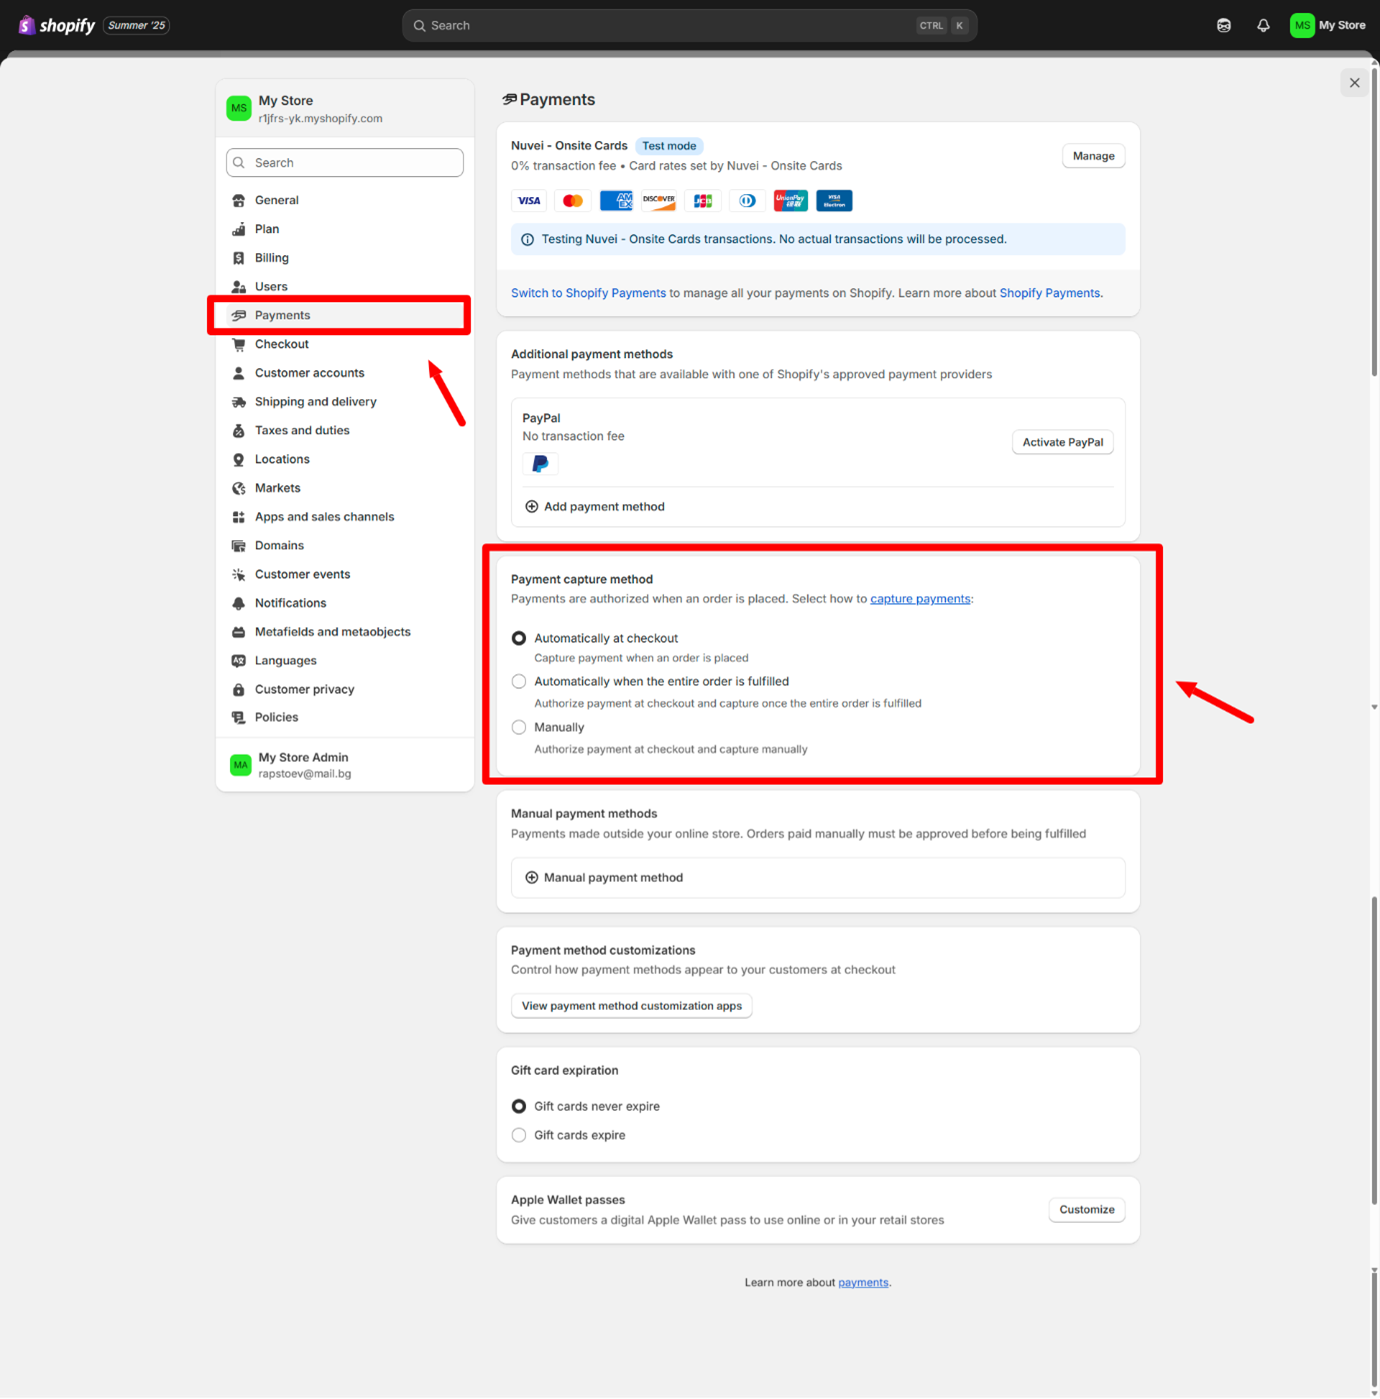 You can choose from:
- Automatically at checkout: Funds are captured immediately.
- Automatically when the entire order is fulfilled: Capture happens only when you fulfill the order.
- Manually: You review and manually capture payments.
Choose the option that best suits your fulfillment workflow.
🔁 Switching from Test to Live Mode
After testing:
- Go to Payments > Nuvei – Onsite Cards
- Toggle Test mode OFF
- Save changes
This enables real transactions.
🎉 You’re All Set!
Your Nuvei – Onsite Cards app is now active and ready to accept card payments securely onsite through Shopify.
 Last modified July 2025