Downloading and Installing the Plugin
https://github.com/Nuvei/nuvei-plugin-magento-2
Logging in to the Admin Panel
- Once your account has been set up, you can access the Plugin through your Internet browser.

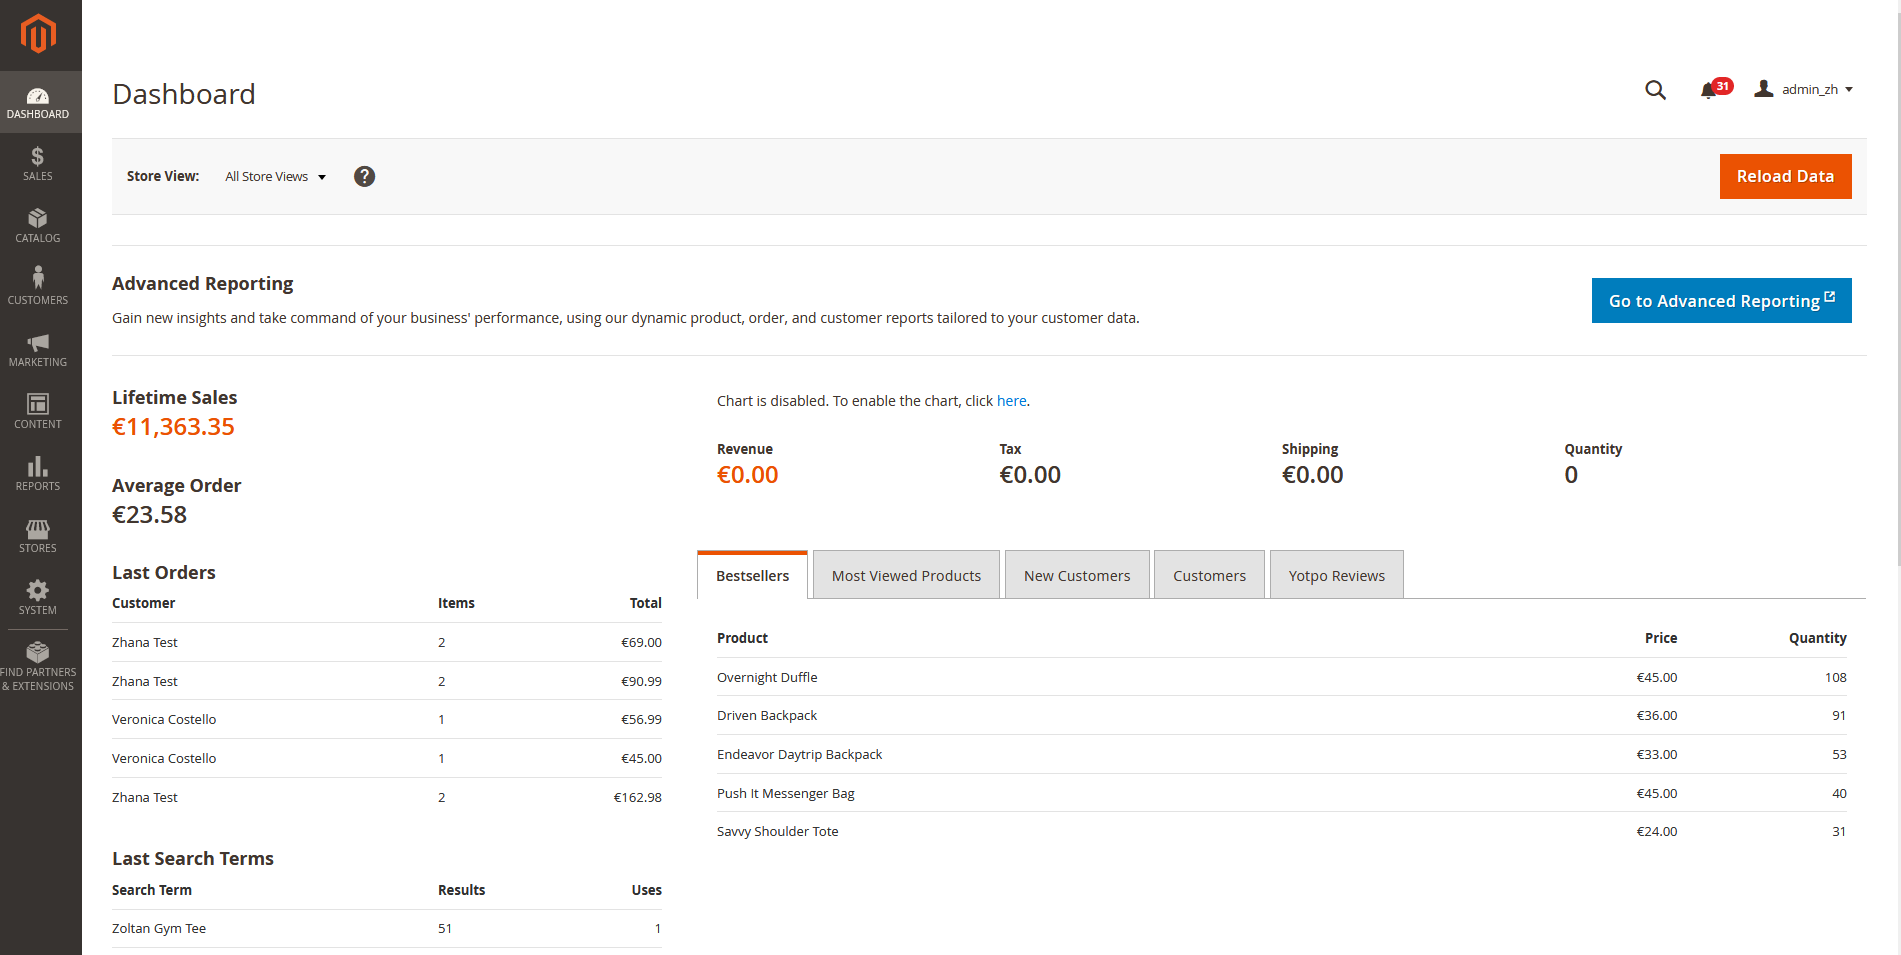
- Enter your Username and Password and press Sign in. The Dashboard screen appears.

The plugin contains the functionality that is used in your account. The two main functionalities that you need are “Stores” and “Sales”, which are in the column on the left side of the page.
Configuration
From the Stores section, you can manage your account details and set the credentials that were given to you by the Nuvei Integration Team.
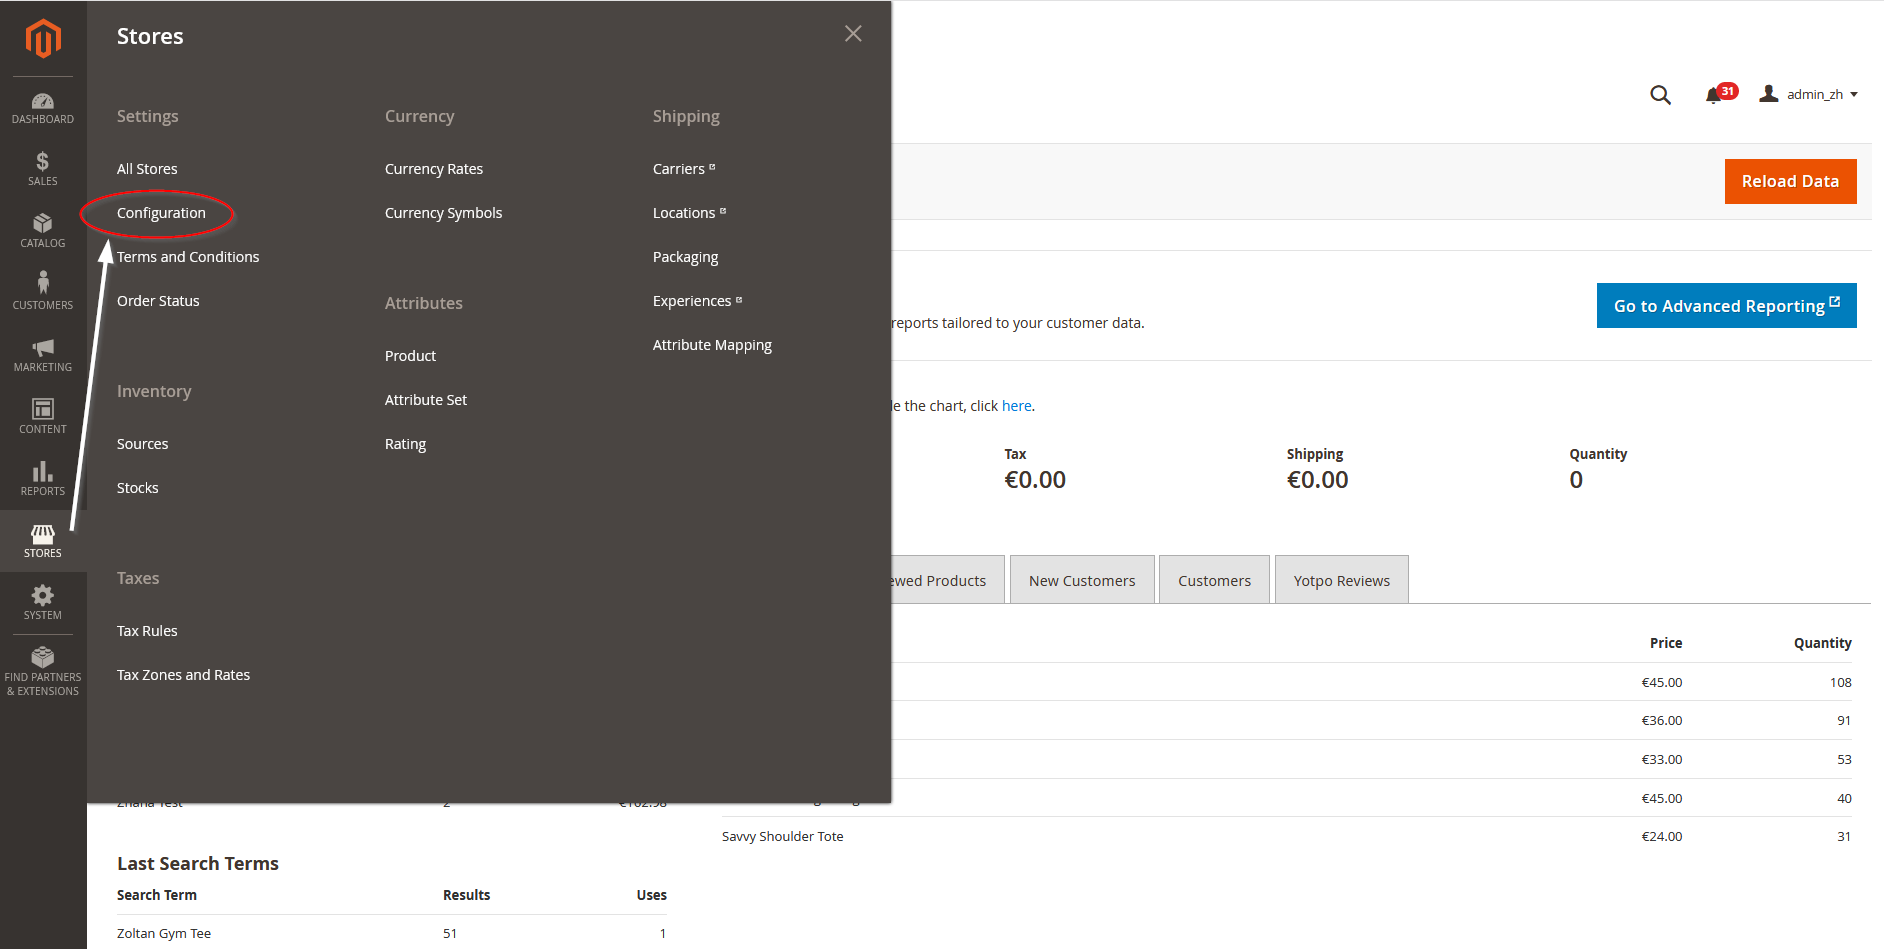
- Press Stores and then Configuration. The Configuration Page appears.

- From the tabs on the left, select Sales. The Sales dropdown menu appears.

- From the Sales dropdown menu, select Payment Methods and the available methods are displayed on the right.

- From the list of payment methods, there is an option for configuration under Nuvei.

Basic Configuration
Parameter Description Enabled Enable or disable the plugin. Title Title of the checkout. Payment Action Toggle between Settle and Auth-Settle. Mode Toggle between Sandbox and Production. Merchant Hash Ask the Integration or Technical Support Team. Merchant ID Ask the Technical Support team. Merchant Site ID Ask the Technical Support Team. Merchant Secret Key Ask the Technical Support Team. Sandbox Merchant ID Ask the Integration Team. Sandbox Merchant Site ID Ask the Integration Team. Sandbox Merchant Secret Key Ask the Integration Team. Select payment SDK You can choose between Simply Connect (recommended) and Web SDK. Save UPOs “Yes” shows checkbox for saving, but the client needs to check it; “No” does not show the checkbox and does not save UPO; “Always” forces saving of UPO and shows only notifications for the client; “Force” shows checked checkbox, but the client can uncheck it. Save UPOs for Guest If the business case requires it, this option enables saving UPOs for guest users. Note that this is not recommended! Show UPOs for Registered users Show or the UPOs for registered users on the checkout page. Disable the Notify URL For specific business cases, disables sending of Notification URL in the openOrder request. This is not recommended, but if you use it, be sure you provided Notification URL(s) to the Integration team. Use Nuvei Gateway for Zero-Total Orders Choose Yes or No. Allow Auto Void Allow plugin to make automatic Void requests when Sale/Auth DMN comes (for third or fourth time) and there is no order in the store. Mask Users details in the log If set to “Yes”, the plugin tries to mask the user details in the log. Save Debug log Select some of the options. Minimum Order Total Minimum Order Total Maximum Order Total Maximum Order Total Sort Order Sort Order Payment from Applicable Countries Default Magento option. Payment from Specific Countries Default Magento option. Simply Connect Configuration
Parameter Description Simply Connect theme Switch between available themes. Use currency conversion Use SDK integrated conversion or not. Block Cards Press here. Block Payment methods Block from available Payment methods. Choose the text on the Pay button. Auto expand PMs Expand the SDK methods or not. APMs window type Choose you preferred way to open an APM window. Auto close APM popup Only for Sandbox mode. Auto close the APM pop-up or not. Checkout Log level Set the log level of the SDK. Checkout translations Translate the SDK.

Notification in case of a transaction without an order in the store

Notification List Help Tools
Parameter Description Get Payment Plans Download the available payment plans. If there are none, a default one is created. Site Notify URL Provide it to the Integration or Technical Support Team. Plugin version Shows the version of the plugin. - Press Save.
Transaction Reports
Using the plugin, you can find Sale requests that were sent from your account as well as settle, credit, and void transactions.
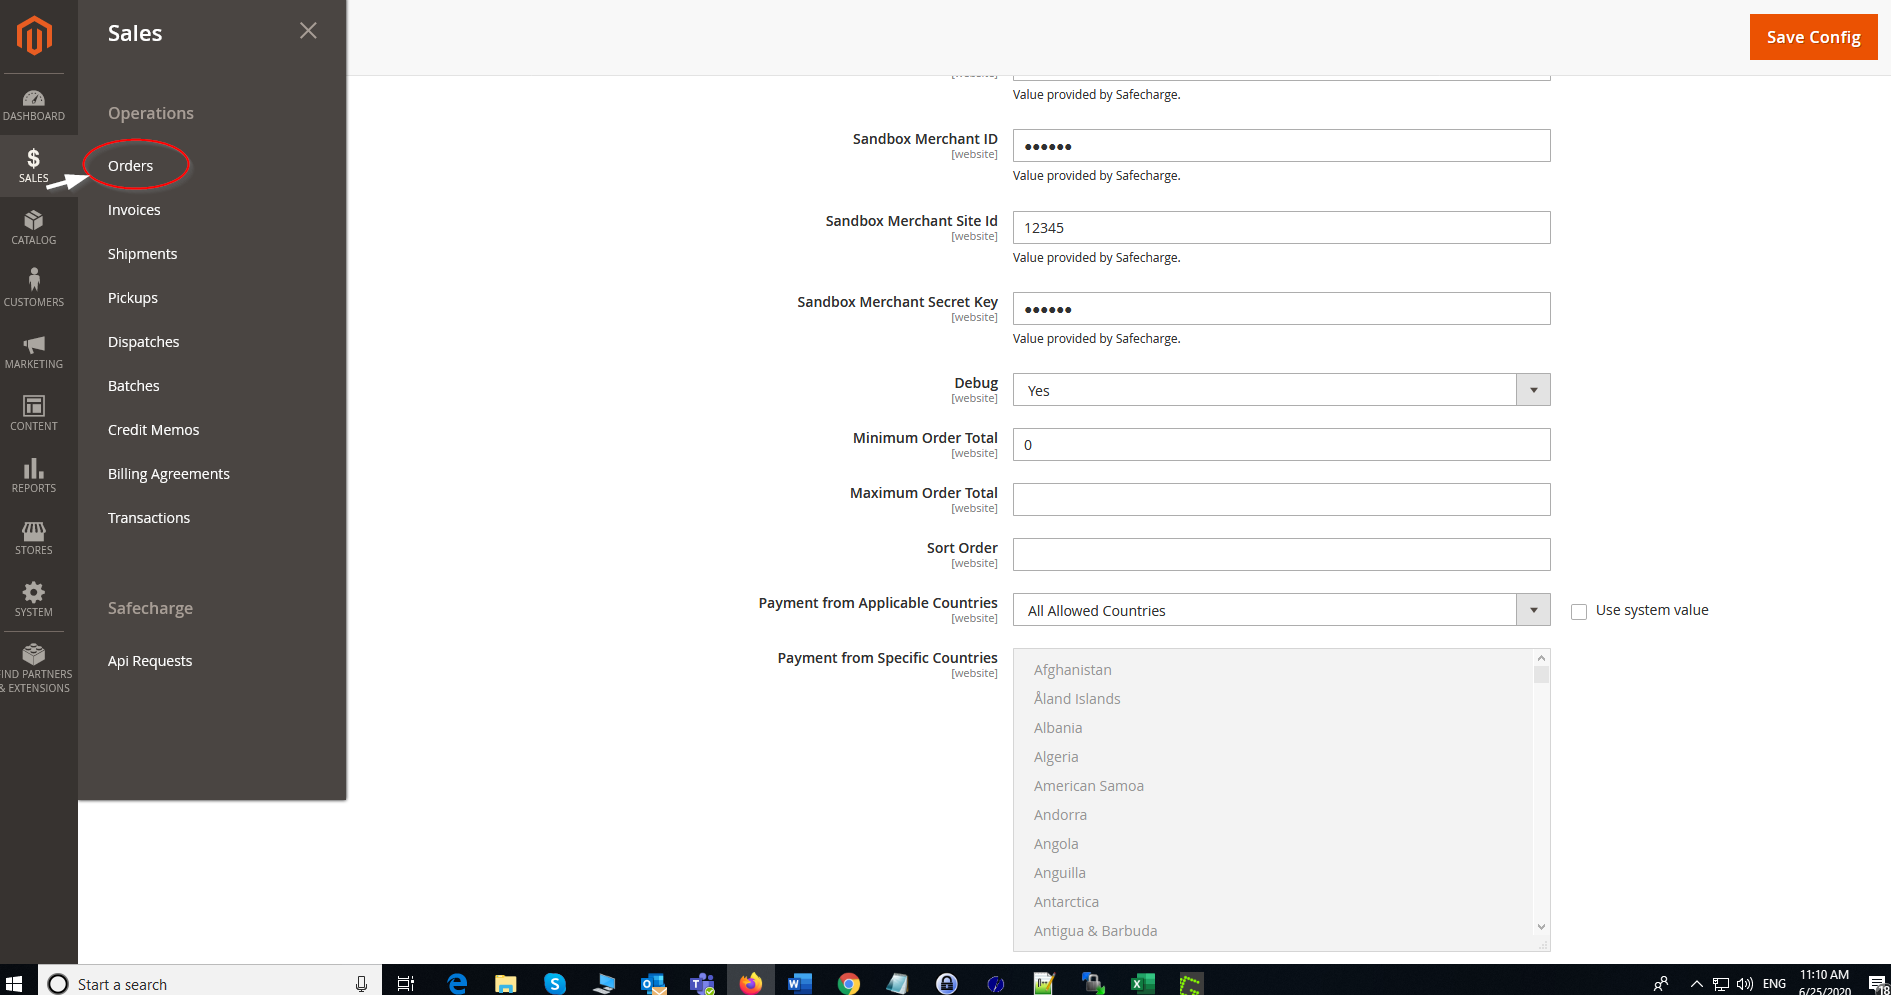
- Press Sales and then Orders. The Orders Page appears.

- Press View in the Action column of the desired transactions. The Order & Account Information page appears.

- In this page, you can find the order details such as the customer information, the item that was ordered, and the amount paid.
Creating an Invoice
Create an invoice to determine whether a specific transaction can be settled, credited, or voided.
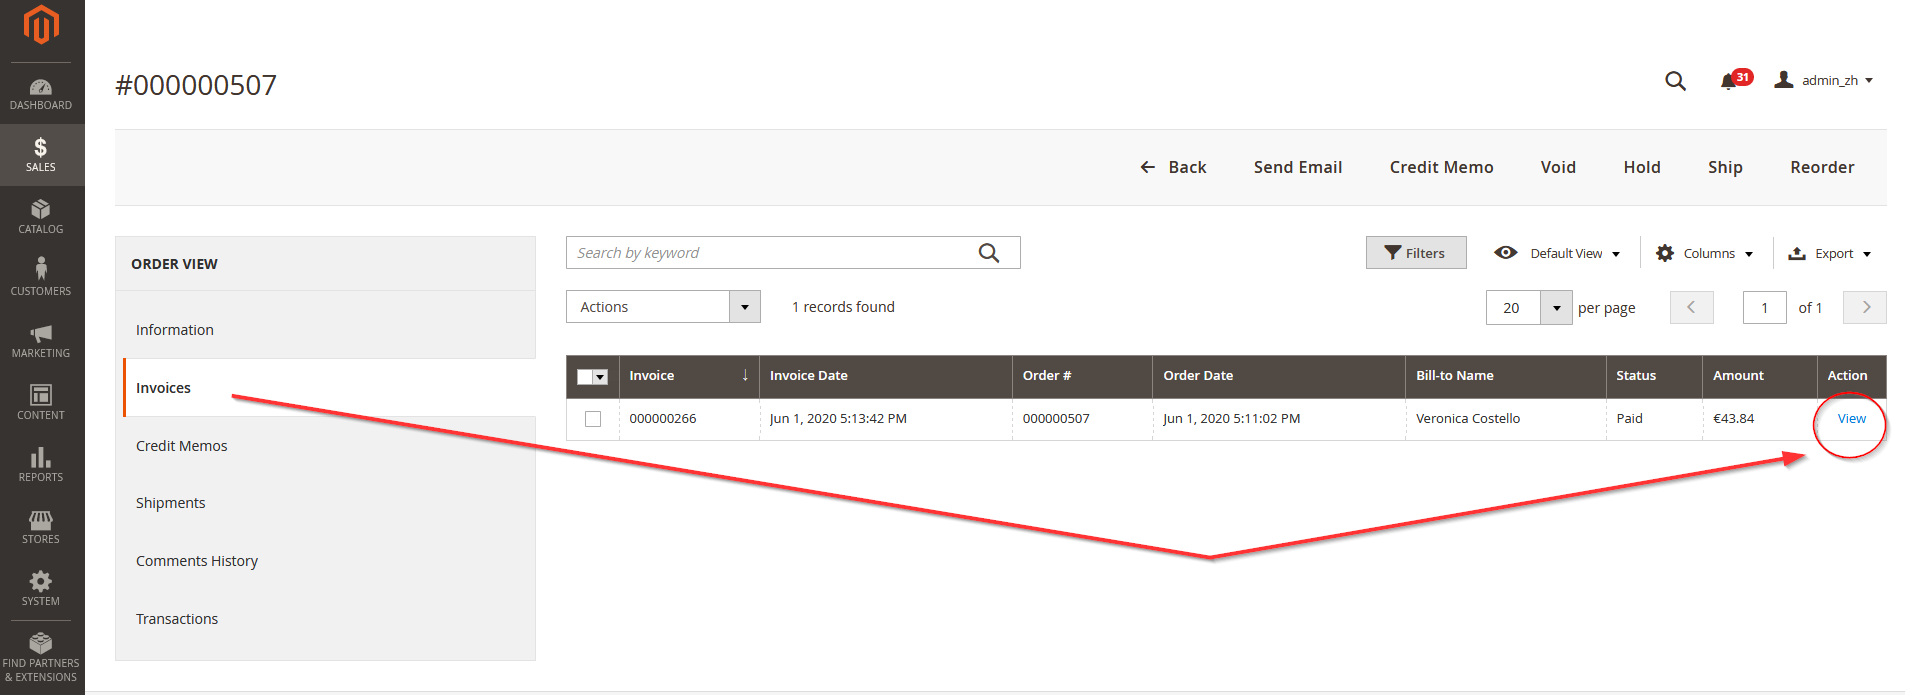
- From the Order View tab on the left, press Invoices and the list of available transactions appears.

- Press View in the Action column of the desired transactions. The order invoice appears.

Performing a Refund
- From the invoice, press Credit Memo in upper right corner of the invoice. The New Memo window appears.

- Enter the desired amounts the Refund Totals section and press Refund and the refund is applied.

Performing a Partial Refund
- From the New Memo window, adjust the quantity of goods in the Qty of Refund box (Step 1)
- Press Update Qty’s (Step 2) and then press Refund (Step 3) and the refund is applied.

Settling a Transaction
- From the Order list, select View from the Action of the desired transaction whose status is listed as ‘SC Auth’. The Order & Account Information window appears.

- You can void the transaction by pressing the Void (Red) tab or settle it by pressing the Invoice tab (Green). The New Invoice window appears.

- From the New Invoice page, you can adjust the quantity of goods in the Qty of Refund column. Press Submit Invoice and the invoice is updated.


 Last modified January 2025