Assumptions and Restrictions
Before proceeding to Nuvei plugin installation, you need to have PrestaShop installed.
The Nuvei plugin should be also installed and configured.
If you do not have test credentials to test the payment flow, please contact our Technical Support team.
Installation
Follow the instructions in the GitHub page to install the plugin:
https://github.com/Nuvei/nuvei-plugin-prestashop
Plugin Configuration
Before setting up the Nuvei PrestaShop plugin, you should contact Technical Support to provide account credentials.
The plugin can be found in Modules > Module Manager menu at the bottom of the page – Other.

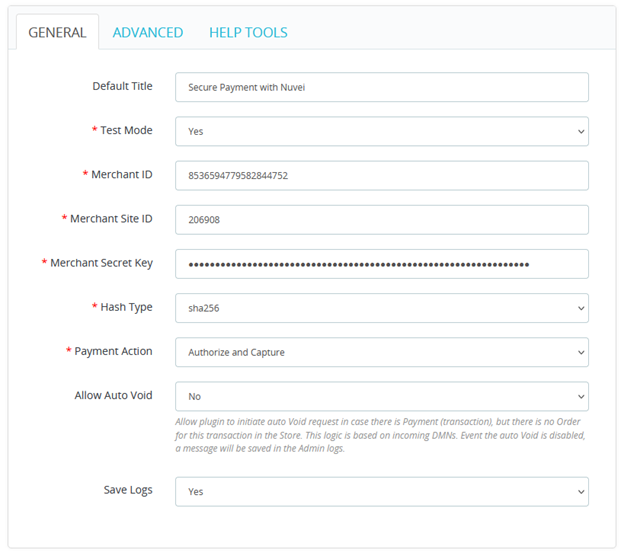
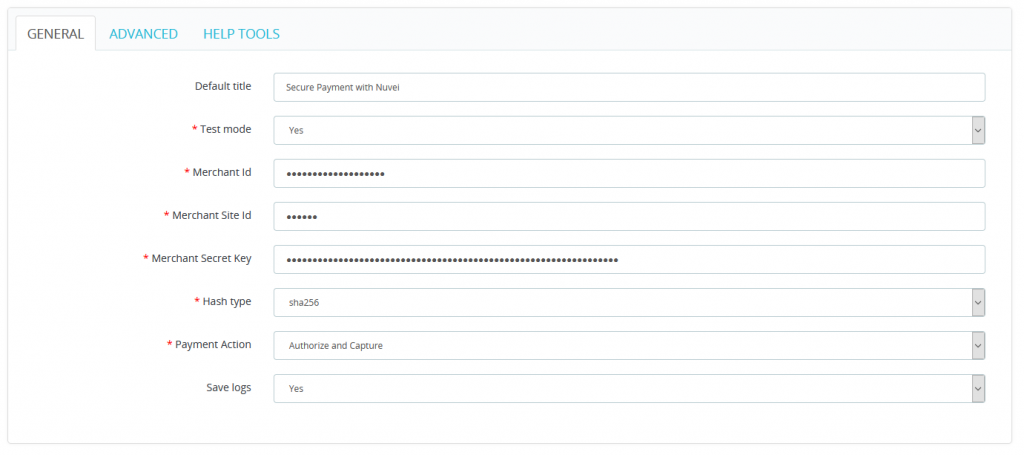
| Parameter | Mandatory | Description |
|---|---|---|
| Default Title | no | The title for the Store |
| Test Mode | yes | Enable the payment test mode. Any payments on the test mode are not really processed. Please, do not use real credit card details. |
| Merchant ID | yes | This is the merchant ID provided by Technical Support. If you don’t have it, please contact Technical Support |
| Merchant Site ID | yes | This is the Merchant Site ID provided by Tech-Support. If you don’t have it, please contact Technical Support |
| Merchant Secret Key | yes | This is the secret key provided by Technical Support. If you don’t have it, please contact Technical Support |
| Hash Type | yes | The hash type provided by Technical Support. If you don’t have it, please contact Technical Support |
| Payment Action | yes | The transaction type preferred from the merchant and approved by Technical Support. If you don’t have it, please contact Technical Support. |
| Allow Auto Void | Yes | Allow or do not allow plugin to initiate a Void request if a DMN does not find a corresponding Order in the Store. In both cases, a notification about the problem is created. |
| Save Logs | no | Create daily logs with sent and received data and settings. The logs are very helpful for debugging and resolving problems with the plugin. |
-
- Advanced for additional plugin settings
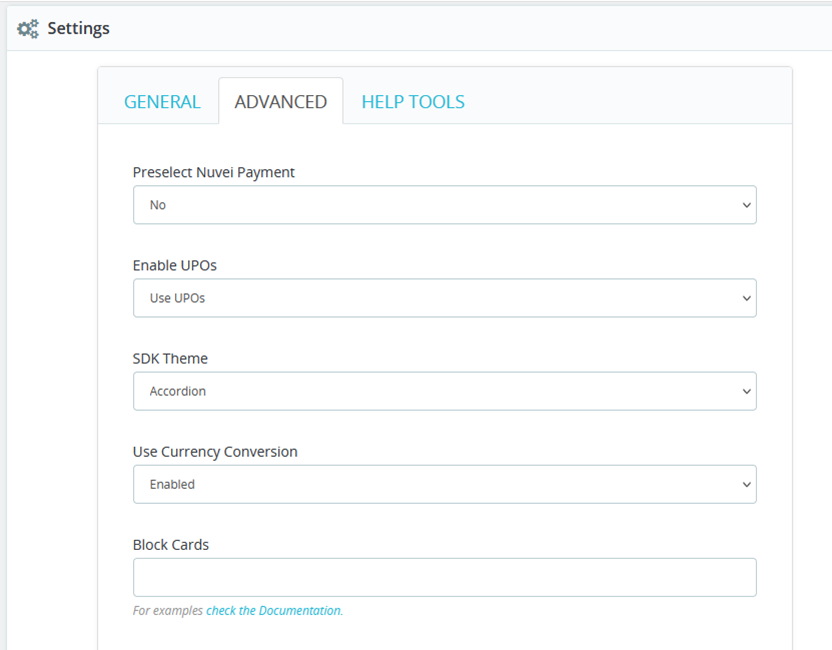
Parameter Mandatory Description Preselect Nuvei Payment No On Yes, the Nuvei Payment Gateway is preselected on the Checkout page. Enable UPOs No Enables using UPOs.
UPOs can be used only from registered users.SDK Theme No Select a theme for the SDK. Use Currency Conversion No Options – disabled, enabled, or enabled and expanded.
When set to “enabled”, user must select the available checkbox to expand and view the convertor.Block Cards No Block some debit/credit cards. Block Payment Methods No If needed, blocks some of the payment methods available for the merchant. Choose the Text on the Pay Button No The button can show the amount or selected payment method. Auto-expand PMs No Automatically expands payment methods container. APMs Window Type No Choose you preferred way to open an APM window. Auto-close APM Pop-Up No Available only for Sandbox mode.
In Production mode, the APMs pop-ups are automatically closed.Mask User Details in the Log No When set to Yes, the plugin tries to mask user personal data into the log. Checkout Log Level No Sets the level of the Checkout SDK logs.
You can check them in the browser console.SDK Translations No Adds custom translation for the SDK. Use Additional Checkout Step No Default is No.
Yes is recommended when using Once Step Checkout plugin. - Help Tools

Parameter Mandatory Description Download Payment Plans If the merchant is planning to use Subscriptions, download the Payment Plans from the Control Panel with this button. If the merchant does not have Payment Plans, a default one is created. Notification (DMN) URL no In some cases, the merchant may need to provide this URL to Integration/Technical Support team. Please DO NOT change this URL if you are not sure what are you doing. This can break the work of the Plugin. The recommended way of usage is to just add a custom Get parameters to the URL.
- Advanced for additional plugin settings
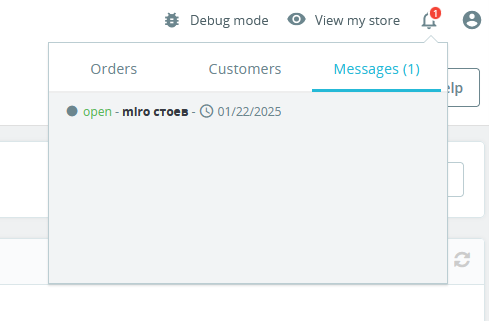
The notification is provided in case a Sale/Auth DMN cannot find the corresponding Order in the Store.
- Press Save.
Payment Page
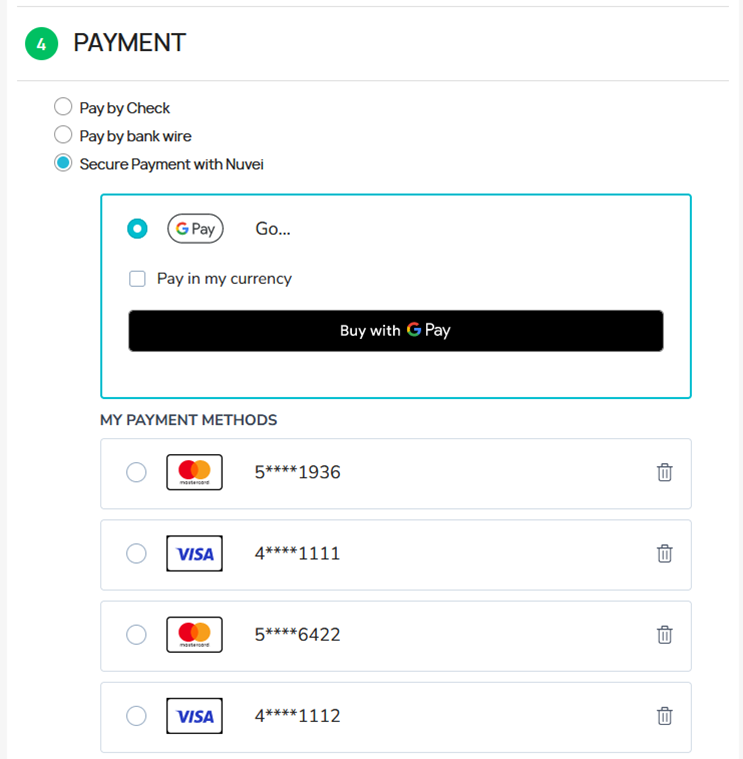
- Select a product from your shop and go to the payment page.
- Follow the steps of checkout.
- In the Payment Method step (its number can be different), select Nuvei (the name may vary).
- After you select the payment method and fill in the required fields, agree with site conditions if any and press Place Order to complete the order.

If an APM was selected, a pop-up opens. Upon successful payment, the user is redirected to a successful order page.
Order Payment Status Update
The order payment details are found in the Sell > Orders > Orders menu.
Press any order. Nuvei orders are marked in the Payment column.
For each order processed with Nuvei, there are order trace notes to help track the payment process.
After successful payment, the transaction is processed and the order status is updated in the background.
Order Details
Order Details and the logs (if they are enabled) are the two places where the merchant can see what happens with an order.
If the Payment Action option is set to “Authorize and Capture”, all new orders have a status of “Payment accepted”. If Payment Action is set to “Authorize”, orders have a status of “Pending payment” and must be manually settled using the Settle button. For different statuses, different buttons are visible.



 Last modified August 2025