The following guide is for plugin version 1.3.0 and above. For older versions, adding a Subscription plan for the Simple product is not possible. Also, mixing products with a plan with any other products is not allowed. Those limitations are removed as of v.1.3.0.
Creating a Subscription
- Create at least one ‘Recurring’ (Subscription) plan in your Control Panel profile.
- Go to the plugin settings: WooCommerce > Help Tools.
- Go to the Product > Attributes menu. A new attribute named Nuvei Payment Plan is displayed.
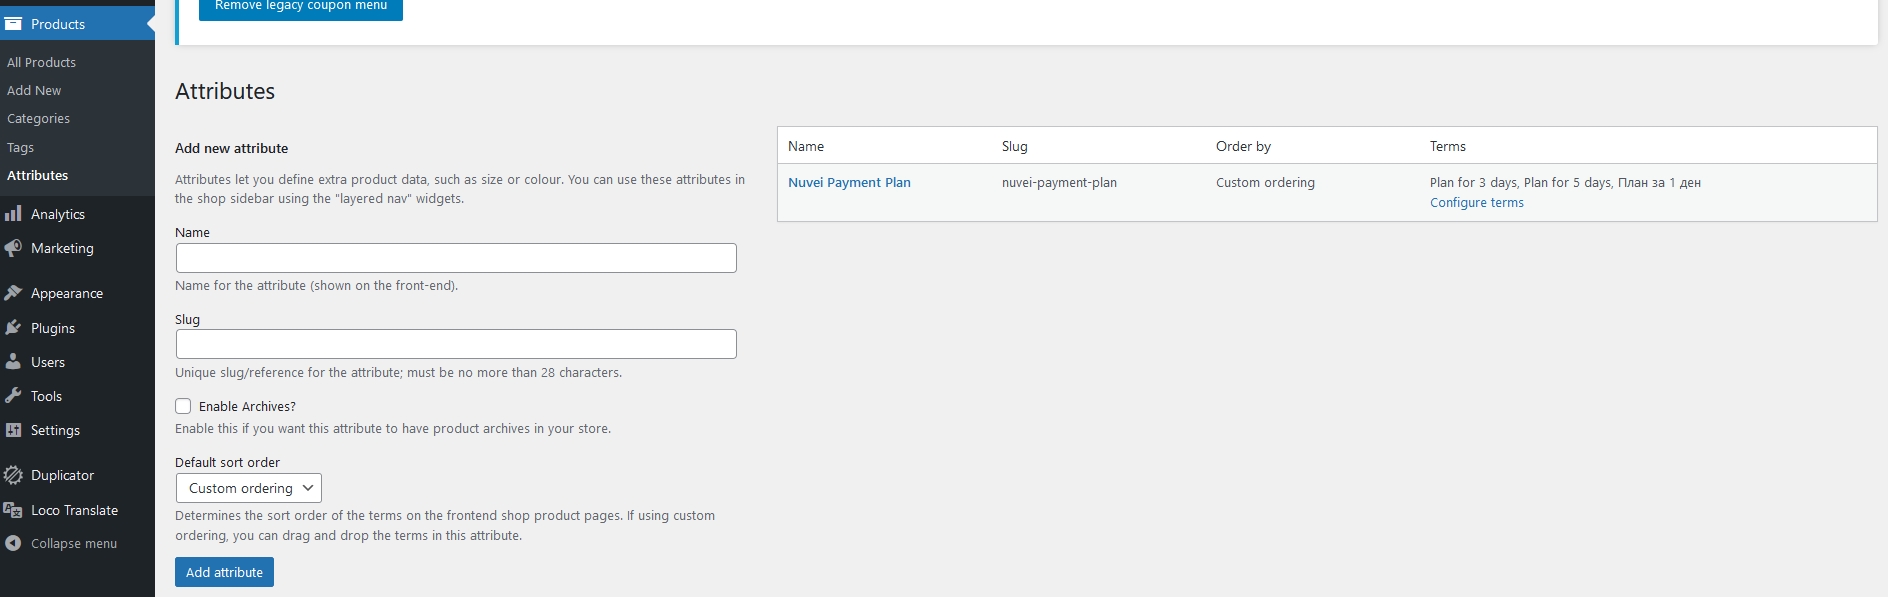 The user must set all plans as terms in the Nuvei Payment Plan attribute.
 - Press Configure terms.
Any existing plans and a form to create new plans are displayed.
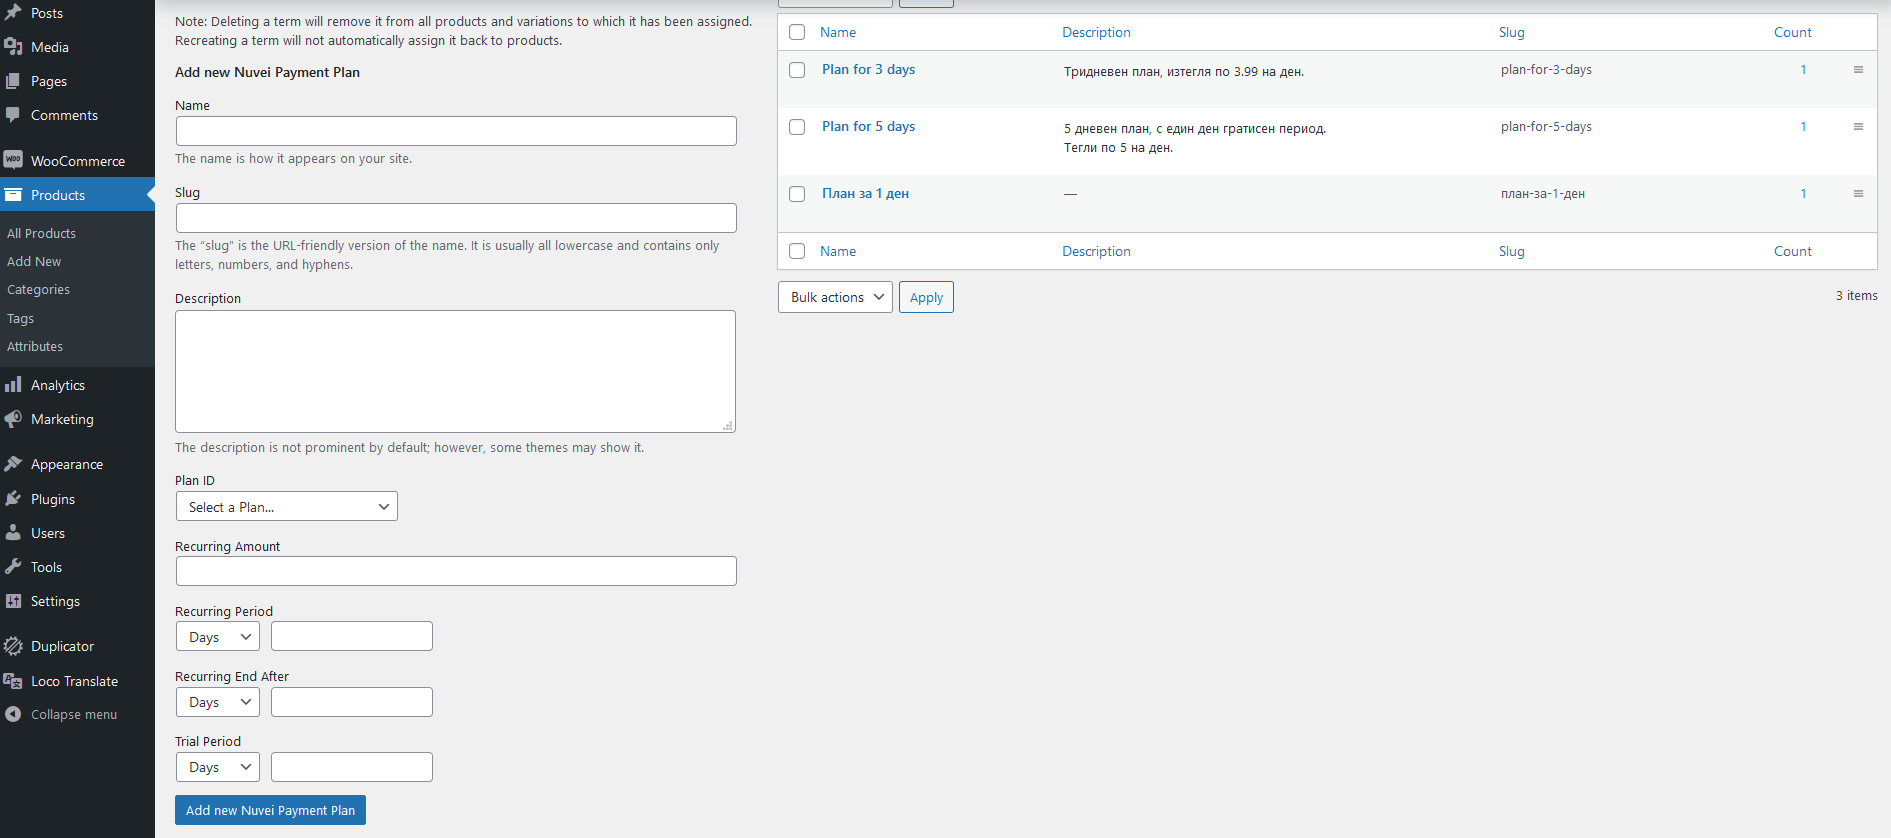
Creating a Plan
- Enter a Name value.
The name will then be visible in the Store. - (optional) Enter Slug and Description values.
- Select Plan ID by its name. In this menu, the merchant can view all of the merchant’s active plans via the Control Panel.
- Set a combination for Recurring Frequency (period).
- Set a combination for the end of Recurring.
- Set a combination for Trial Period.
- Save the plan.
Creating Simple Product with Payment Plan
- Go to Products > All Products menu.
- Select a product to edit.
- In the Product data dropdown list, select Simple product.
- From the Attributes menu, in the dropdown list select Nuvei Payment Plan and then press Add.
- Press the newly added attribute to expand the details.
- Press Value(s) input and select only one plan.
This becomes the default plan for the product. It is recommended to describe the plan details in the Product description section. - If you check the Visible on the product page checkbox, the name of the payment plan is visible in the store, on the product page in ‘Additional information’.
- Press the Save attribute button.
The product is ready.
Creating Variable Products with Different Payment Plans
- Go to Products > All Products menu.
- Select a product to edit.
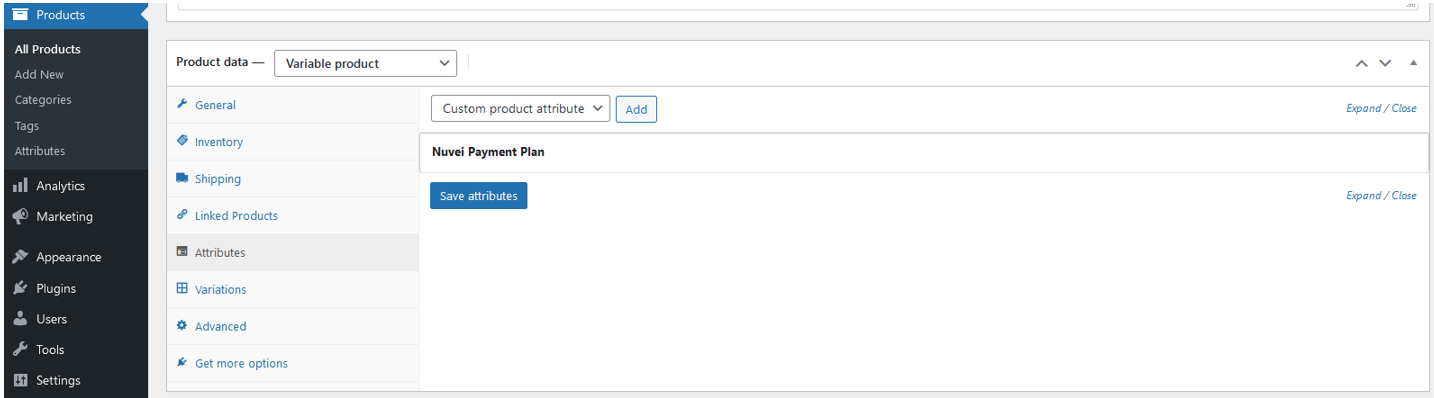
- In the Product data dropdown list, select Variable product.
- From the Attributes menu, in the dropdown list select Nuvei Payment Plan and then press Add.
- Press the newly added attribute to expand the details.
- Press Value(s) input and select as the plans that you need or press Select all to add all plans.
- It is important to check the Used for variations checkbox.
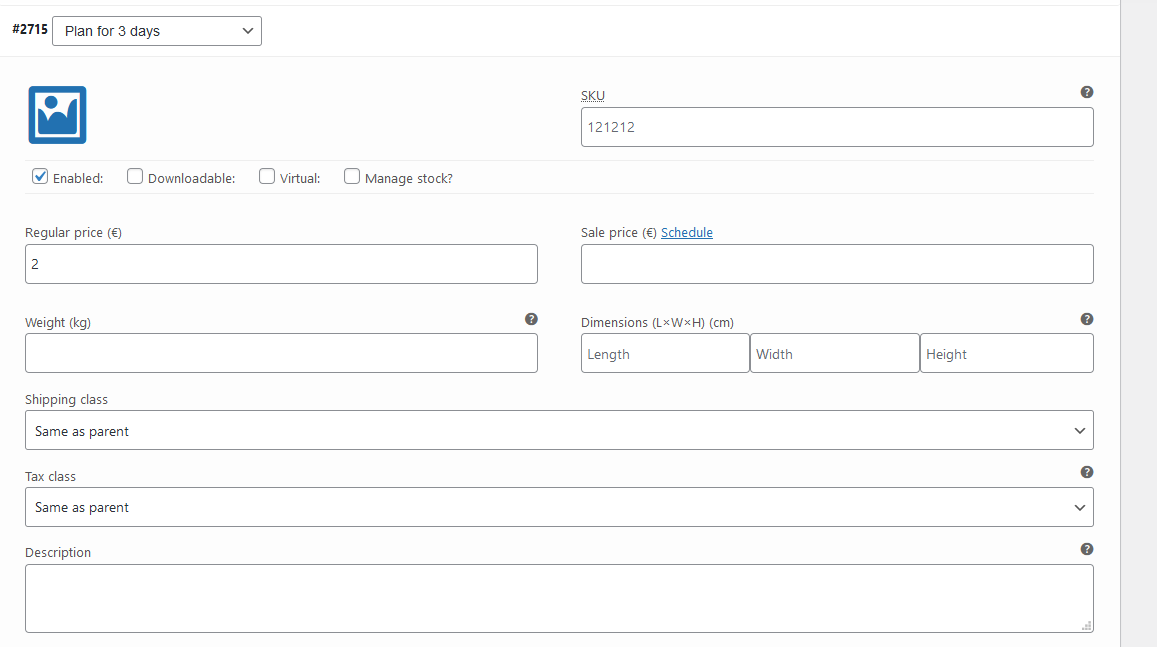
- From the Variations menu, create variations based on the Nuvei Payment Plan.
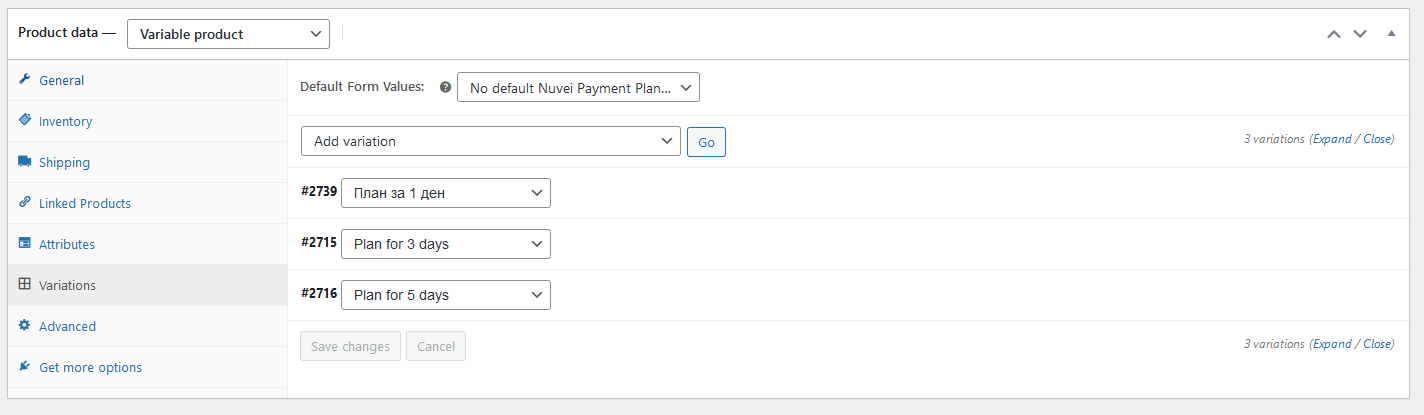
The variations are displayed as Options for the product in the store. - Expand the variations, set the details as needed, and save any changes.
Store View
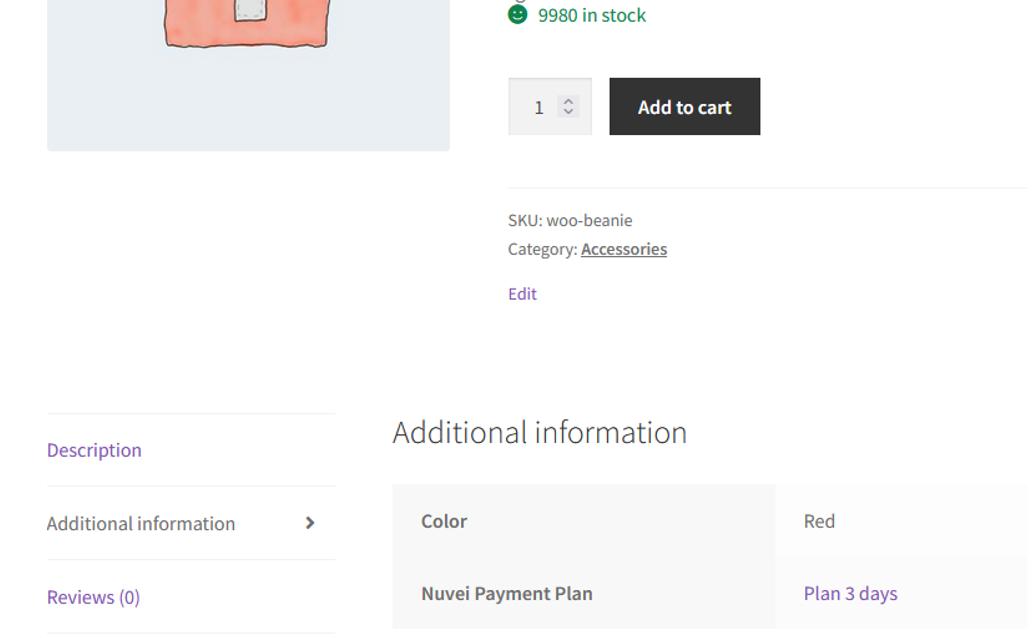
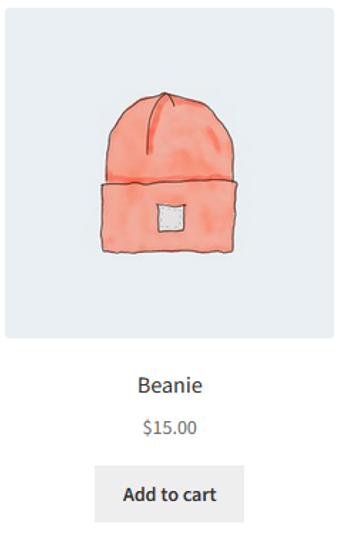
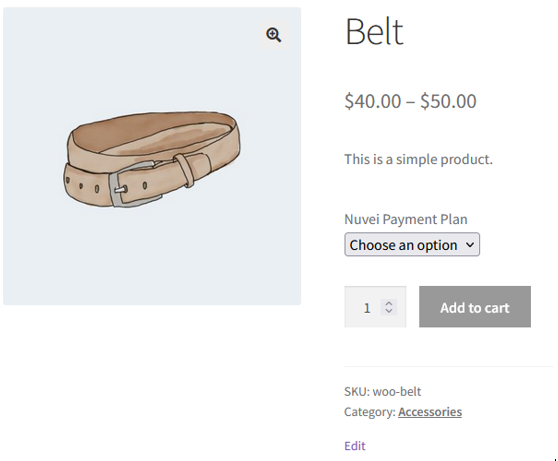
In the store, the Simple products with a Payment plan are displayed in the same way as are other products.
Variable products are displayed in a slightly different way.
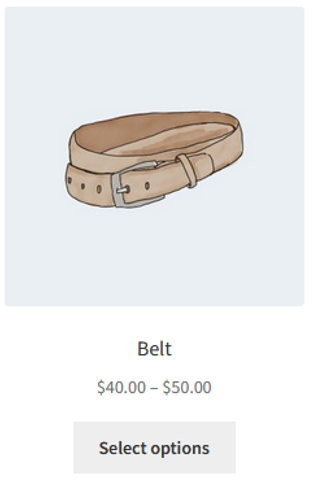
When the customer selects Select options, the product page opens.
If the customer selects more than one product of the same variation, a single Subscription is created but the charged amount is multiplied by the product quantity.
For each different product or variation, a separate Subscription plan is activated.
The Subscriptions start after the order is completed via the Settle and Sale transaction or after the Auth transaction with zero total amount. The Zero-Auth does not need to be settled and cannot be settled.
In WooCommerce > Orders menu, the Orders with Plans are marked as follows:
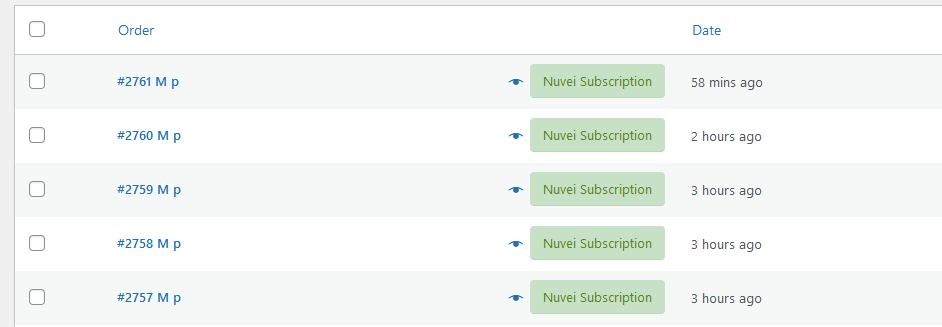
When you open the Order details, the information for all transactions and subscriptions is available as order notes.
In the Items section for each Product with a subscription plan, the Nuvei Subscription ID is displayed. If the Subscription plan is active, the Cancel Subscription button is also available.

 Last modified November 2025